

Table of Contents
- 1. Why Flooring Adhesive Choice Depends on the Flooring Material
- 2. Matching Adhesive to Flooring Type
- 3. Subfloor Moisture: The Test Most Installers Skip
- 4. Subfloor Preparation Beyond Moisture
- 5. Trowel Technique and Coverage
- 6. Common Flooring Adhesive Mistakes
- 7. Radiant Heat Flooring: An Additional Compatibility Check
- 8. Frequently Asked Questions
- 9. Choosing the Right Adhesive System
A hardwood floor installed over the wrong adhesive can look perfect on day one and start cupping, gapping, or debonding within a single humid season. Flooring adhesive isn’t a single interchangeable product — it has to match the flooring material, the subfloor, and the moisture conditions it will face, and the most common failures trace back to one of those three being overlooked rather than a defective product. This guide covers how to select the right adhesive system and the installation details that determine whether it holds for the life of the floor.
Why Flooring Adhesive Choice Depends on the Flooring Material
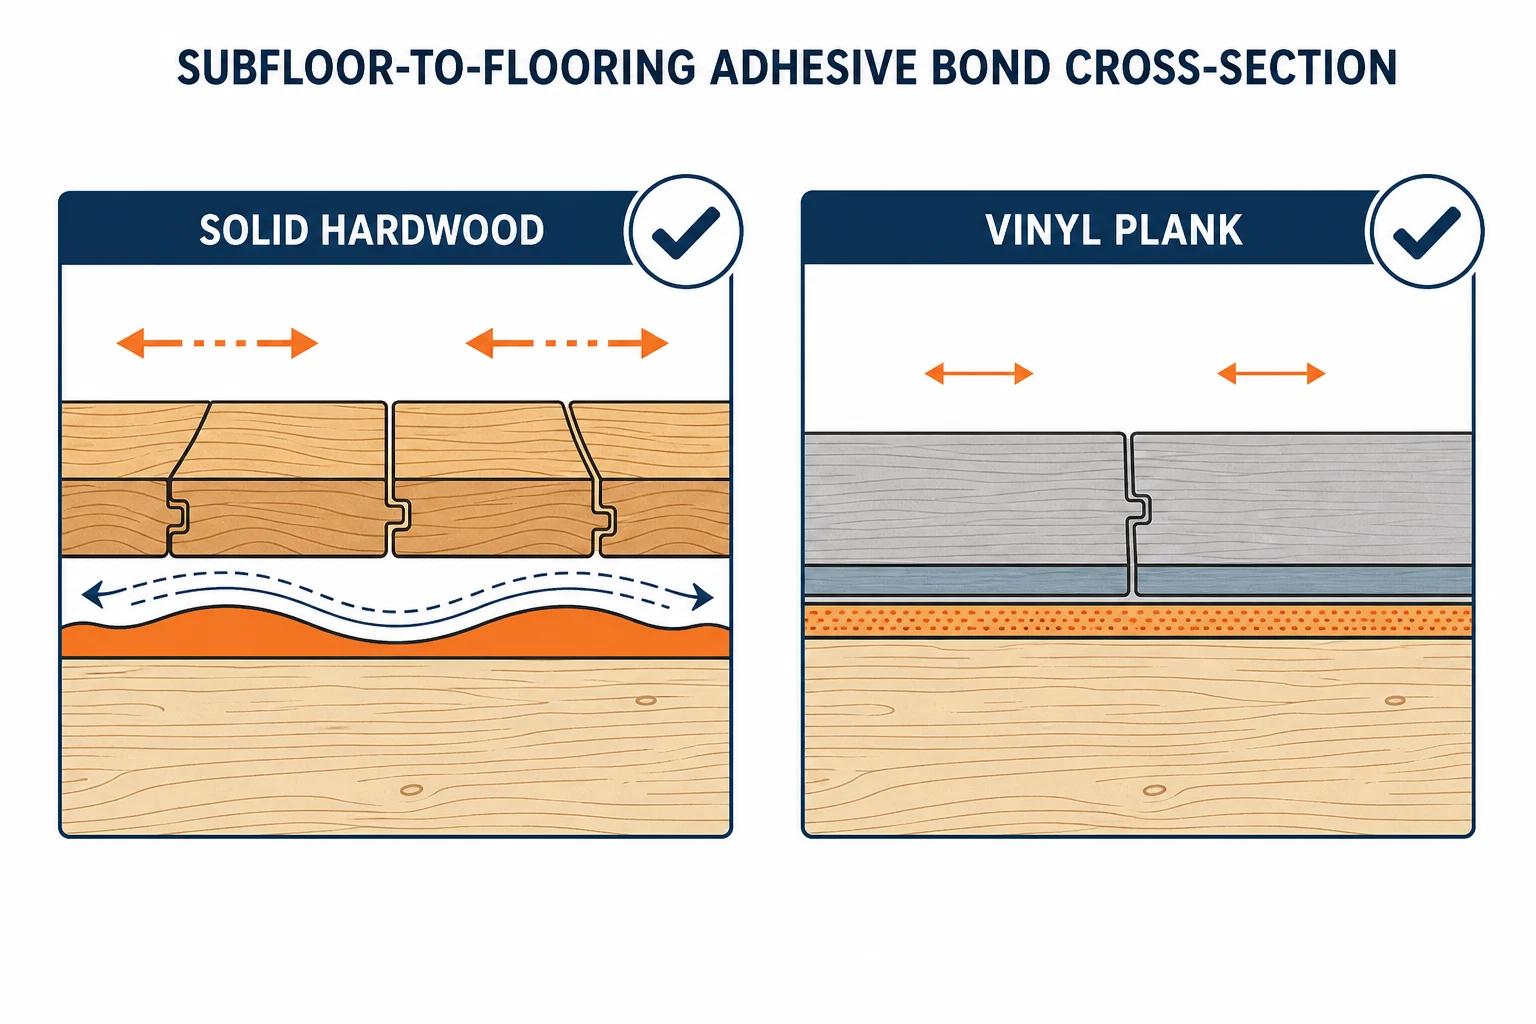
Different flooring materials move, expand, and respond to moisture in different ways, and the adhesive bonding them to the subfloor has to accommodate that specific behavior rather than just “stick.”
Solid hardwood expands and contracts significantly across its width with seasonal humidity changes, so wood floor adhesive formulated for hardwood needs enough flexibility to absorb that movement without the bond line cracking or the boards cupping at the edges. Engineered wood and laminate move less than solid hardwood but still require a compatible, often moisture-resistant adhesive at the subfloor interface. Resilient flooring like vinyl plank or luxury vinyl tile (LVT) has its own category of pressure-sensitive adhesives designed for minimal dimensional movement and, in many cases, the ability to be released and repositioned during a install.
Matching Adhesive to Flooring Type
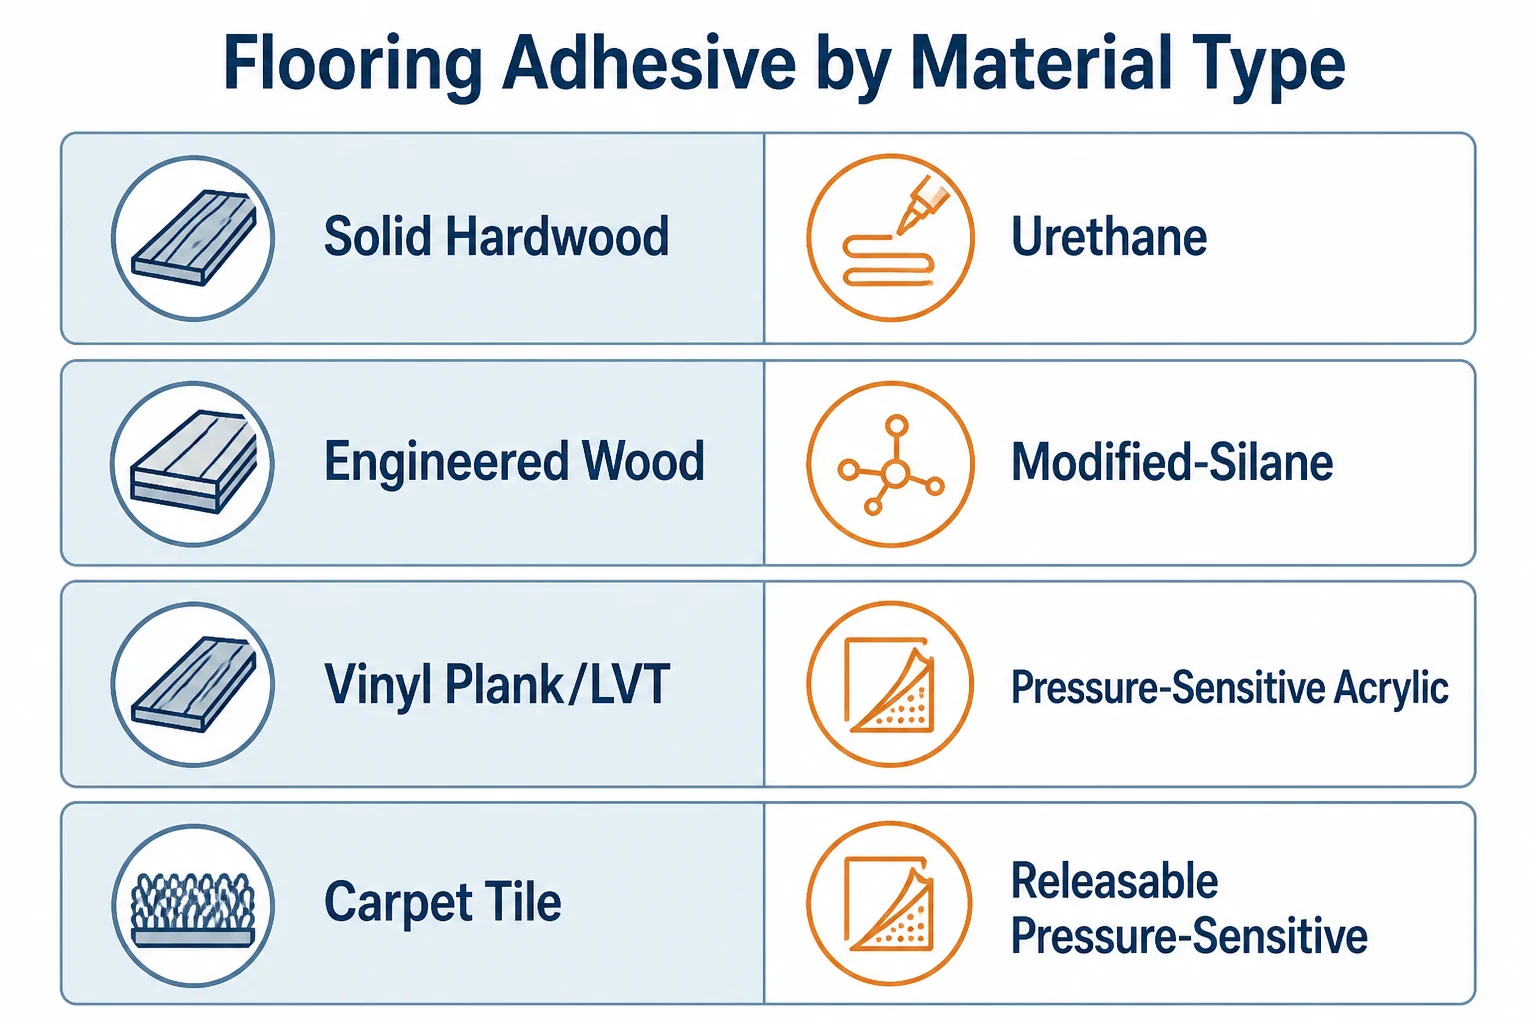
| Flooring Type | Typical Adhesive Category | Key Consideration |
|---|---|---|
| Solid hardwood | Urethane-based wood floor adhesive | Must accommodate significant seasonal wood movement without bond failure |
| Engineered wood | Urethane or modified-silane adhesive | Less movement than solid hardwood but still needs flexibility at the bond line |
| Vinyl plank / LVT | Pressure-sensitive acrylic adhesive | Minimal movement; some products allow repositioning during installation |
| Carpet tile | Releasable pressure-sensitive adhesive | Designed for future tile replacement without full re-adhesion |
Subfloor Moisture: The Test Most Installers Skip
Adhesive failure on flooring jobs is more often a subfloor moisture problem than an adhesive selection problem, and skipping the moisture test is one of the most common — and most expensive — shortcuts in flooring installation.
Concrete subfloors release moisture vapor as they cure and can continue releasing moisture for a long time afterward, especially on slabs without a proper vapor barrier beneath them. A calcium chloride test or in-situ relative humidity probe should be used to confirm the slab is within the adhesive manufacturer’s acceptable moisture range before installation — not estimated by feel or by how long the slab has been poured. Installing wood floor adhesive over a slab that tests outside the acceptable moisture range is one of the most reliable ways to see adhesive failure and floor cupping within months, regardless of how well the adhesive itself was applied.
Subfloor Preparation Beyond Moisture
- Flatness tolerance. Most flooring adhesive manufacturers specify a maximum flatness deviation (commonly a small variance over a defined span) — subfloors outside that tolerance need leveling compound before adhesive application, not extra adhesive to fill the gap.
- Cleanliness. Dust, old adhesive residue, paint overspray, and curing compounds left on a concrete surface all reduce bond strength; mechanical preparation (grinding or shot-blasting) is often needed on older slabs rather than just sweeping.
- Compatibility with existing coatings. Sealers or curing compounds applied to a new slab can prevent proper adhesive bonding unless they’re specifically compatible with the flooring adhesive being used — this should be confirmed before the slab is sealed, not discovered during installation.
Trowel Technique and Coverage
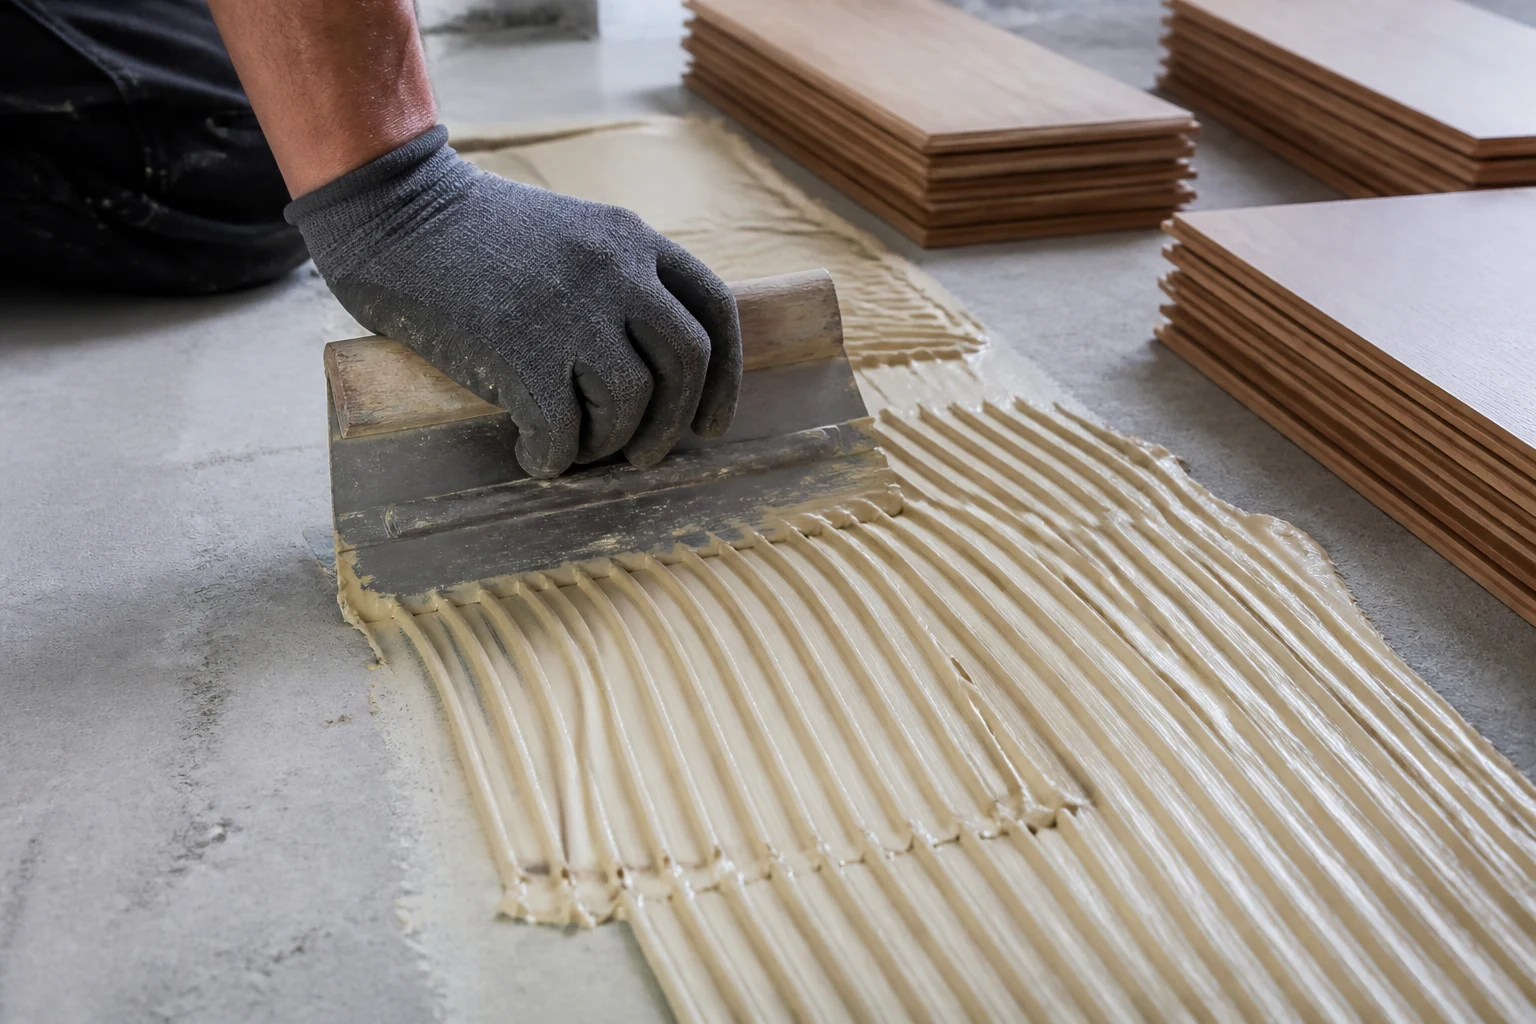
The trowel notch size specified by the adhesive manufacturer isn’t a minor detail — it’s calibrated to deliver the adhesive coverage and ridge height the flooring material needs for full contact transfer.
Using a trowel notch that’s too small under-applies adhesive and leaves voids beneath the flooring, which can telegraph through as hollow spots or lead to localized debonding under foot traffic. Using one that’s too large wastes material and can cause excess adhesive squeeze-out at seams. The flooring should be set into the adhesive while it’s still within its open time — the window after application during which it retains enough tack for proper transfer — rather than after a skin has formed on the surface, which prevents full contact bonding.
Common Flooring Adhesive Mistakes
- Skipping the subfloor moisture test and installing on a slab that’s still releasing excess moisture vapor.
- Using a generic construction adhesive instead of a flooring-specific product rated for the material and expected movement.
- Setting flooring after the adhesive has skinned over, missing the open time window for proper transfer bonding.
- Ignoring subfloor flatness tolerance and relying on extra adhesive to compensate for an uneven surface instead of leveling it first.
- Installing directly over an incompatible sealer or curing compound without verifying compatibility with the flooring adhesive first.
Radiant Heat Flooring: An Additional Compatibility Check
Installing flooring over a radiant heat subfloor adds a thermal cycling stress that standard flooring adhesive specifications don’t always address by default.
Radiant systems cycle the subfloor temperature up and down repeatedly, and the flooring adhesive bonded to that surface experiences the same thermal cycling as a continuous stress over the life of the floor, not just during installation. Not every flooring adhesive is rated for use over radiant heat, and a product that performs well on a static-temperature subfloor can still fail prematurely over a radiant system if it wasn’t formulated or tested for that application. Always confirm the specific adhesive’s radiant-heat compatibility with the manufacturer before installation, and follow any specified maximum subfloor temperature during both installation and the system’s gradual warm-up period after the floor is complete — bringing a radiant system up to full temperature too quickly after installation is a separate common cause of early flooring and adhesive problems.
Frequently Asked Questions
Can you use the same adhesive for hardwood and vinyl flooring?
No. Solid hardwood needs a flexible, often urethane-based adhesive that can accommodate significant seasonal wood movement, while vinyl plank and LVT typically use pressure-sensitive acrylic adhesives designed for much less dimensional movement. Using a vinyl-rated adhesive under solid hardwood, or vice versa, is a common cause of early bond failure.
How do you know if a concrete subfloor is too wet for flooring adhesive?
A calcium chloride moisture test or an in-situ relative humidity probe test, performed according to the adhesive manufacturer’s specified method, is the reliable way to confirm the slab’s moisture level. Visual dryness or time since the pour are not reliable substitutes for an actual moisture test.
What happens if the trowel notch size is wrong for the flooring adhesive?
A notch too small under-applies adhesive, leaving voids that can cause hollow spots or localized debonding under traffic. A notch too large wastes material and increases squeeze-out at seams. The manufacturer’s specified trowel size is calibrated for the correct coverage and ridge height for that specific adhesive and flooring type.
Choosing the Right Adhesive System
Match the adhesive category to the specific flooring material rather than assuming any flooring adhesive is interchangeable, test subfloor moisture before installation rather than estimating it, and follow the manufacturer’s specified trowel notch and open time rather than improvising on-site. For broader adhesive selection criteria beyond flooring-specific applications, our Industrial Epoxy Adhesive Buyer’s Guide covers related substrate bonding considerations.
Explore Joobond’s Silicone Sealant and Polyurethane Sealant ranges for formulations suited to construction and installation bonding applications adjacent to flooring work.
Keyword research source: SeoTools8 (Semrush-backed), US database, desktop, 2026-10-11. Seed “flooring adhesive” — Volume 880/mo, KD 23%, global 99,248 related keywords, total volume 3,965,960. Long-tail “wood floor adhesive” — Volume 1,900/mo, KD 12%; “flooring glue” — Volume 1,600/mo, KD 23%.
 English
  العربية
  Español de México
  Русский
  Tiếng Việt
  Português do Brasil
  Bahasa Indonesia
  Türkçe