

Table of Contents
- 1. Why a Rigid Seal Defeats the Purpose
- 2. Where Acoustic Sealant Is Actually Required
- 3. Acoustic Sealant vs. Standard Caulk vs. Fire-Rated Sealant
- 4. Application Best Practices
- 5. Common Mistakes That Undermine Acoustic Performance
- 6. Verifying Performance Without Specialized Equipment
- 7. Frequently Asked Questions
- 8. Choosing the Right Approach for Your Project
A wall that measures well on paper for sound transmission can still leak noise badly in practice, and the culprit is almost always the same: unsealed penetrations and perimeter gaps that bypass the assembly’s rated performance entirely. Acoustic sealant is the material that closes those gaps without compromising the wall’s ability to flex and absorb vibration — but it only works if it’s used correctly and in the right locations. This guide covers how acoustic sealant actually functions, where it’s required, and how to avoid the mistakes that let sound leak straight through an otherwise well-built wall.
Why a Rigid Seal Defeats the Purpose
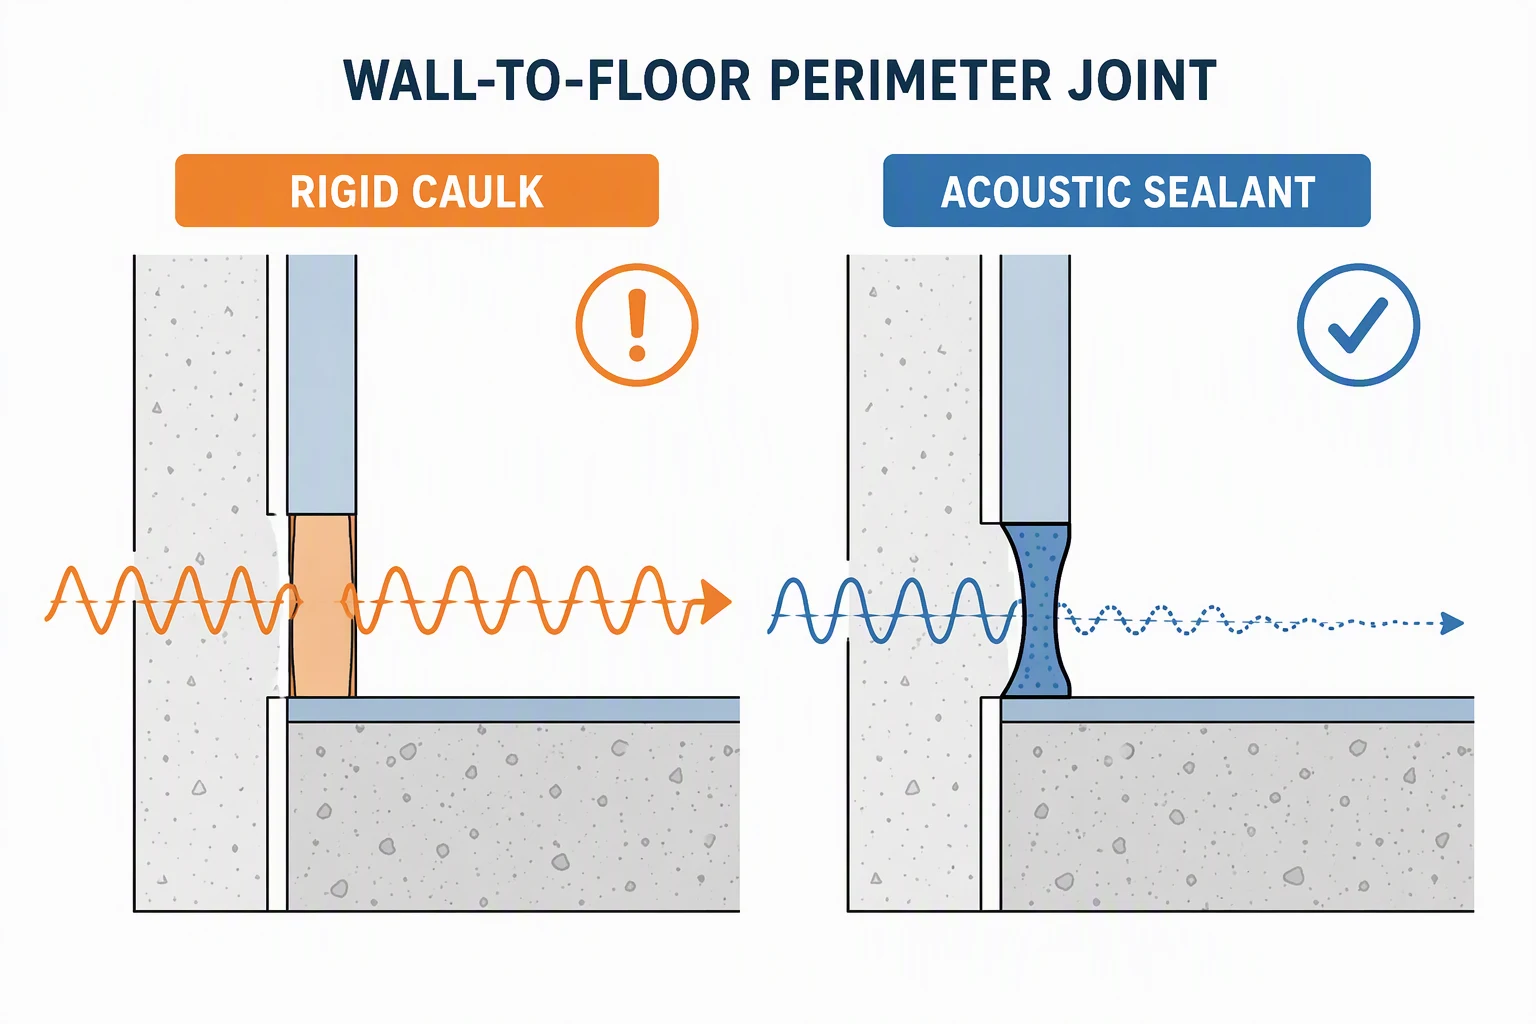
Sound travels through a wall assembly in two ways: as airborne sound passing through gaps, and as structure-borne vibration transmitted through rigid connections between building elements. A standard rigid sealant or caulk — the kind used for general construction gaps — defeats acoustic isolation precisely because it’s rigid. Once cured hard, it creates a stiff bridge between two surfaces that were otherwise supposed to be acoustically decoupled, transmitting vibration directly across the gap it was meant to seal.
Acoustic sealant is formulated specifically to stay permanently non-hardening and flexible, sometimes described as “non-skinning” or remaining tacky throughout its service life. That permanent flexibility is the entire point: it closes the air gap for sound transmission purposes while absorbing vibration rather than transmitting it, maintaining the acoustic isolation the wall assembly was designed to provide.
Where Acoustic Sealant Is Actually Required
Acoustic sealant isn’t applied to the whole wall surface — it’s targeted at the specific perimeter and penetration points where sound bypass most commonly occurs.
- Top and bottom plate perimeter. The gap where drywall meets the floor and ceiling track is one of the most common flanking paths for sound, and it’s frequently left unsealed in standard framing practice.
- Electrical outlet and switch boxes. Boxes cut into a rated wall assembly create a direct air path through the wall unless sealed around their perimeter, undermining the assembly’s rated performance at that point.
- Pipe and duct penetrations. Any mechanical penetration through an acoustic-rated wall or floor needs sealing at the penetration point, not just fire-stopping — fire-rated sealant and acoustic sealant solve different problems and one does not substitute for the other.
- Control joints and expansion joints in long wall runs, where a rigid filler would crack under normal building movement and eventually open a sound path.
Acoustic Sealant vs. Standard Caulk vs. Fire-Rated Sealant
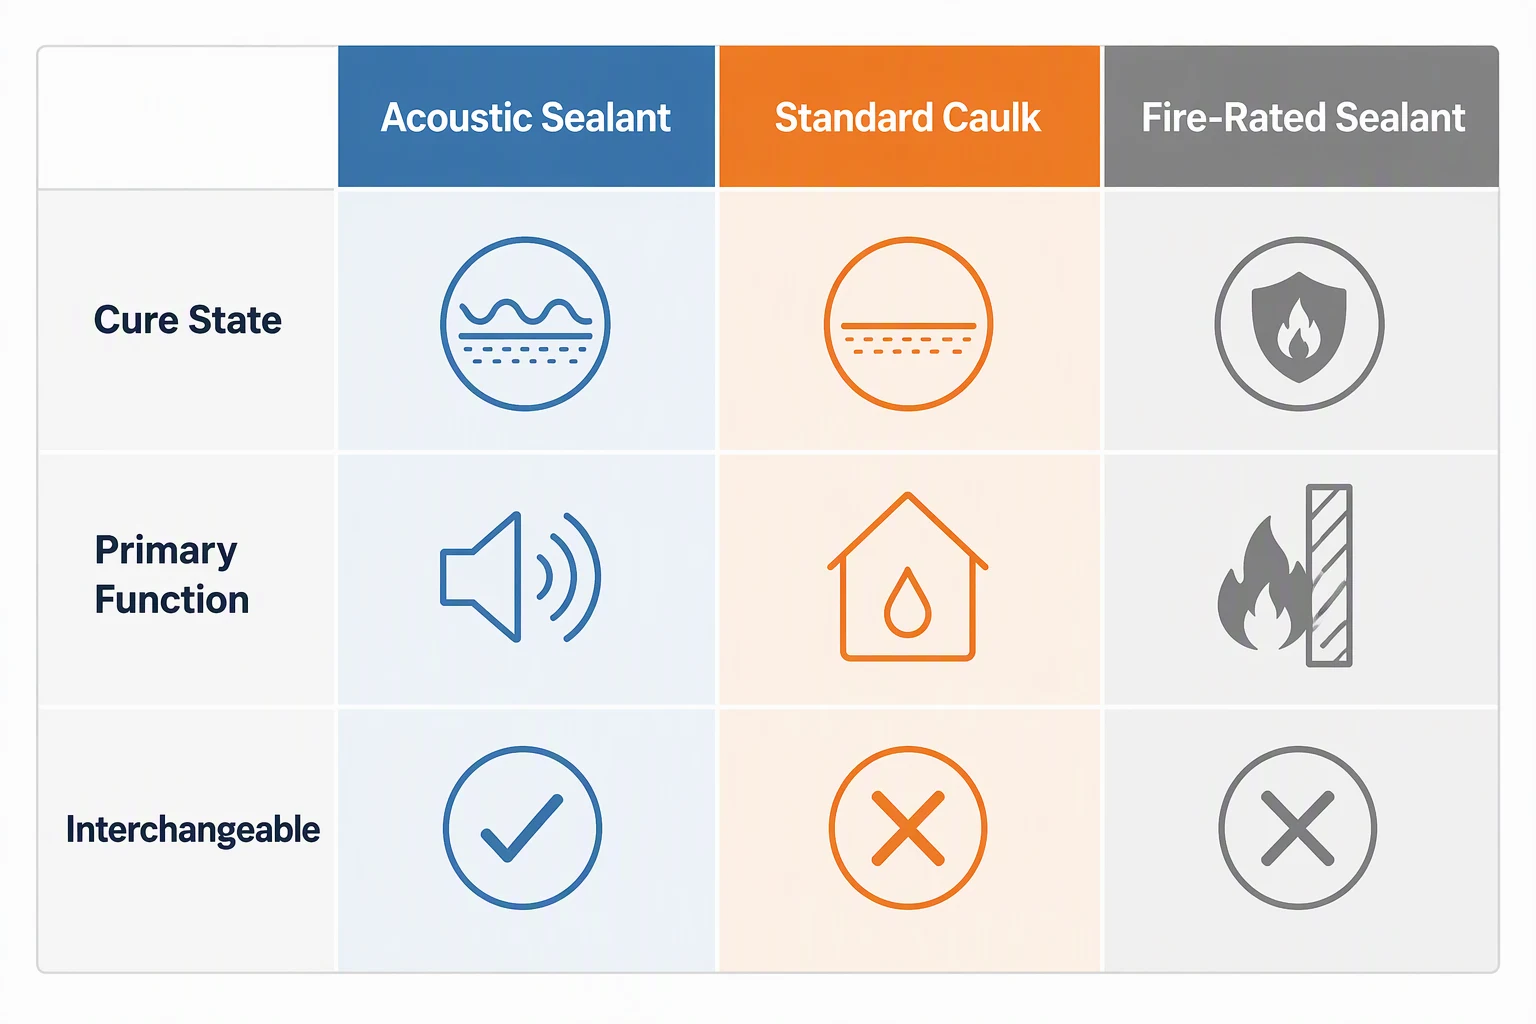
| Factor | Acoustic Sealant | Standard Construction Caulk | Fire-Rated Sealant |
|---|---|---|---|
| Cure state | Permanently non-hardening / flexible | Cures to a firm, often rigid finish | Varies — formulated for fire resistance, not acoustic performance |
| Primary function | Vibration isolation + air seal | General gap filling and weatherproofing | Maintains fire-rating of a penetration or joint |
| Typical use location | Wall perimeter, penetrations, control joints | General construction gaps, trim, non-acoustic joints | Through-penetrations in fire-rated assemblies |
| Interchangeable with the others? | No — rigid caulk defeats isolation | No — lacks permanent flexibility | No — not tested or listed for acoustic performance |
Application Best Practices
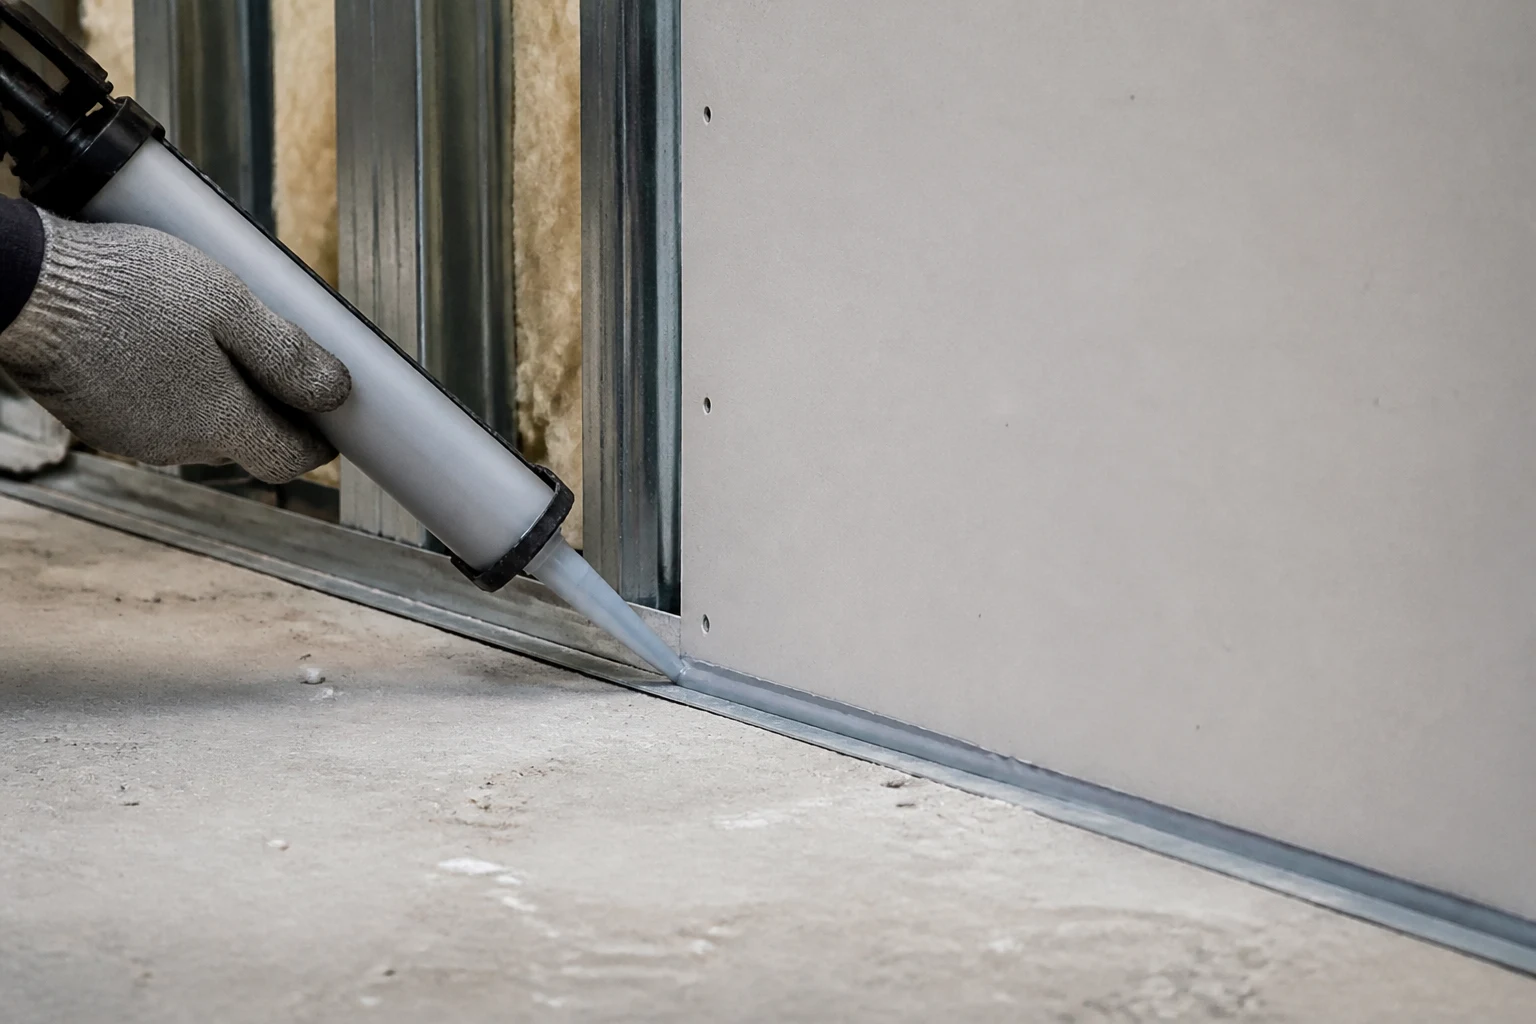
- Apply a continuous, unbroken bead along the full perimeter being sealed — a gap of even an inch in the bead reopens the flanking path the sealant was meant to close.
- Don’t tool it flush and thin. Acoustic sealant generally performs better with adequate bead thickness maintained, since a thin smeared film doesn’t provide the same vibration-damping mass as a proper bead.
- Seal before the wall is closed up wherever possible — perimeter sealing at the top and bottom plate is far easier to execute correctly before drywall installation than as a retrofit afterward.
- Don’t paint over the expectation that paint will seal gaps. Paint film has no meaningful acoustic sealing value; gaps need to be closed with sealant before finishing, not papered over.
- Verify compatibility with the specific wall assembly’s tested acoustic rating (such as a documented STC rating) rather than assuming any flexible sealant qualifies — assemblies are often tested with a specific sealant type.
Common Mistakes That Undermine Acoustic Performance
- Using standard caulk because it’s already on the job site, substituting rigid material for flexible without realizing the functional difference.
- Sealing only the visible gaps and missing concealed penetrations behind outlet boxes or above ceiling tracks that aren’t visually obvious during a walkthrough.
- Treating fire-stopping and acoustic sealing as the same task and applying only one product where both requirements exist at a penetration.
- Skipping perimeter sealing on interior partition walls because they’re assumed to be “just a non-rated wall,” when sound isolation between rooms still depends on the same sealing principle regardless of fire rating.
- Painting or finishing over a joint that was never actually sealed underneath, creating a false impression that the gap has been addressed.
Verifying Performance Without Specialized Equipment
Most job sites don’t have access to acoustic testing equipment, which means visual inspection and a basic understanding of flanking paths have to substitute for formal measurement during construction.
A simple light test can reveal gaps that will also leak sound: with interior lights on and the space being inspected dark, visible light leaking around an outlet box, through a wall-floor junction, or around a penetration is a strong indicator that sound will pass through the same path. This isn’t a substitute for proper STC testing on critical assemblies, but it’s a practical field check that catches the most common oversights before drywall and finishing hide the problem.
For assemblies where a documented acoustic rating is contractually required — multi-family party walls, recording studios, or healthcare privacy walls — formal post-construction sound testing by a qualified acoustic consultant remains the only way to confirm the assembly actually meets its rated performance, since sealant application quality alone doesn’t guarantee the full assembly hits its target STC.
Frequently Asked Questions
Can you use regular caulk instead of acoustic sealant?
No. Standard caulk cures to a rigid or semi-rigid finish, which creates a stiff bridge that transmits vibration across the gap it fills — defeating the acoustic isolation the gap was supposed to preserve. Acoustic sealant is specifically formulated to remain permanently flexible for this reason.
Does acoustic sealant also work for fire-stopping?
No, these are separate requirements with different tested formulations. A penetration that needs both fire-stopping and acoustic sealing typically requires both a listed fire-rated product and acoustic sealant used according to the specific assembly’s tested detail, not one product doing both jobs.
Where is acoustic sealant most commonly needed in a wall assembly?
The top and bottom plate perimeter where drywall meets floor and ceiling track, around electrical boxes and other penetrations, and at control or expansion joints are the most common locations where sealing is required to maintain a wall’s intended acoustic performance.
Choosing the Right Approach for Your Project
Identify every perimeter, penetration, and control joint in the acoustic-rated assembly before closing up the wall, apply a continuous bead of permanently flexible sealant at each location, and verify the product is compatible with the assembly’s tested rating rather than assuming any flexible sealant qualifies. Treat fire-stopping and acoustic sealing as separate, sometimes co-located requirements rather than interchangeable tasks. For broader sealant chemistry and selection criteria, our Industrial Epoxy Adhesive Buyer’s Guide and HVAC Duct Sealant Guide cover related penetration-sealing scenarios.
Explore Joobond’s Silicone Sealant and Polyurethane Sealant ranges for formulations suited to flexible, long-term joint sealing applications.
Keyword research source: SeoTools8 (Semrush-backed), US database, desktop, 2026-10-11. Seed “acoustic sealant” — Volume 1,000/mo, KD 24%, global 5.5K. Long-tail “acoustic sealant for soundproofing” — Volume 3,600/mo, KD 14%; “acoustical sealant” — Volume 1,000/mo, KD 20%.
 English
  العربية
  Español de México
  Русский
  Tiếng Việt
  Português do Brasil
  Bahasa Indonesia
  Türkçe